

Where Were The Hanging Gardens Of Babylon
I love gardening and DIY, especially when I can combine the two!

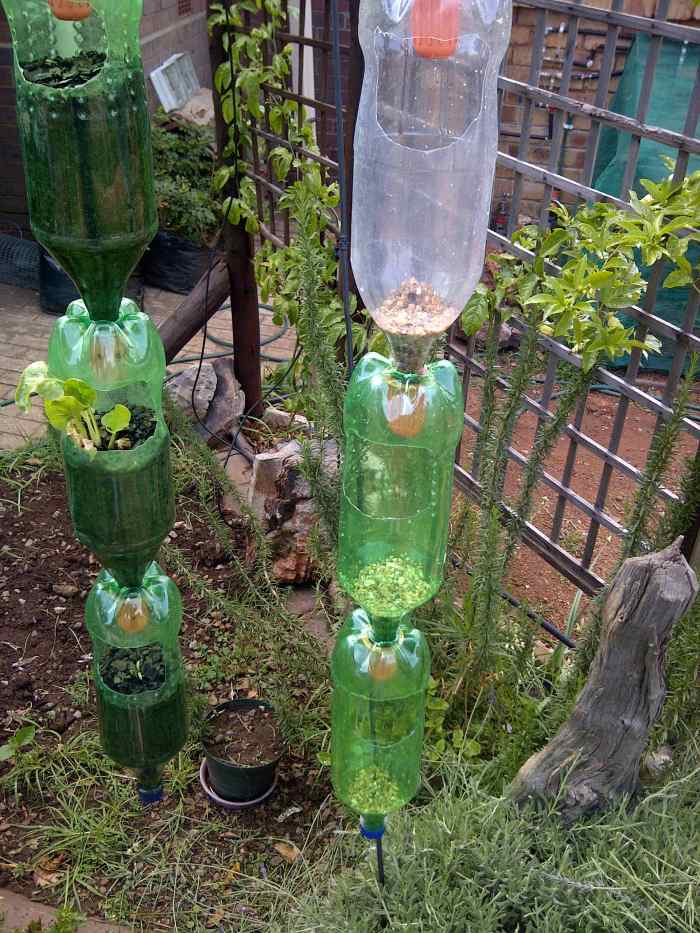
My DIY Hanging Garden
How to Build a Hanging Garden With Bottles
One day, I was looking at my empty 2-liter plastic bottles and wondered how I could recycle them. I love gardening and decided that whatever I was going to use the bottles for had to be for something my garden.
After thinking for a while, I saw that I could use the bottles by placing them one above the other and letting the water flow through the bottles from top to bottom, saving water in the process.
Besides saving water, I could also grow my own fresh produce within the least space possible (in the bottles). This is a practical project for all garden lovers who want to utilize small spaces.
Materials for a Hanging Garden
- Twenty or more empty 2-liter bottles
- Six 500 ml empty bottles
- Plastic tape
- 1 x 1 meter PVC 15mm pipe
- Knife
- Scissors
- Wire
- Drill with small drill bit
- Printing caps or bottle caps
- Gravel
- Potting soil
- Plants or seed
Collecting bottles could be a challenge, but with help from family and friends, you will have more bottles than you know what to do with in no time. You could also collect used bottles from a dump site.
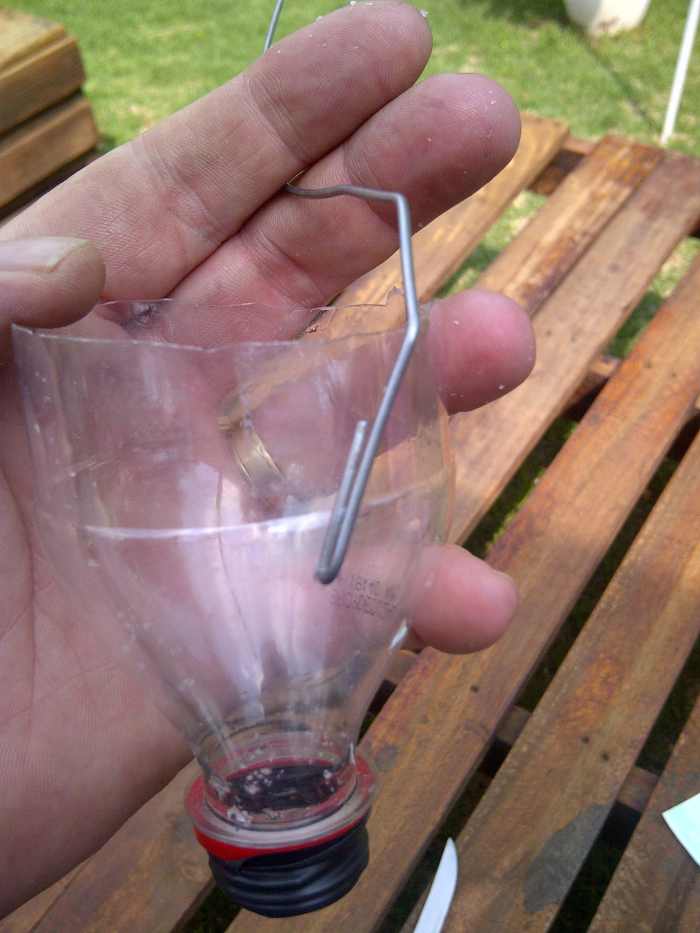
Hole is now drilled and ready for the next step
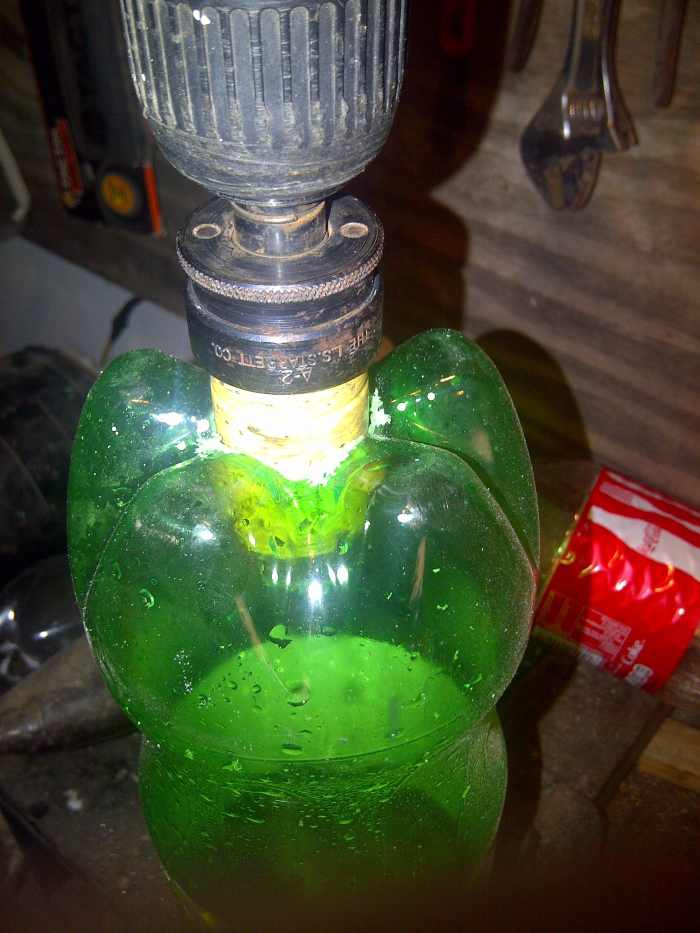
Step 1: Drill Holes in the Bottles
My first challenge was to get these bottles hooked up one to another. I tried to cut a hole in the top with a knife but found it impossible. I then drilled small holes in the pattern that I wanted and tried to cut it, but that didn't work the way I wanted, either.
Then I remembered that I had a drill bit that drills larger holes for down lighting, so off I went to look for the tool and set it to a smaller hole size. I found the perfect fit for the bottleneck. Drilling a hole in the bottom of a 2-liter bottle is not the easiest task I have done, but after some practice, it is not so difficult.
Always remember: Safety first. Remember to wear the necessary protective gear for the job at hand.
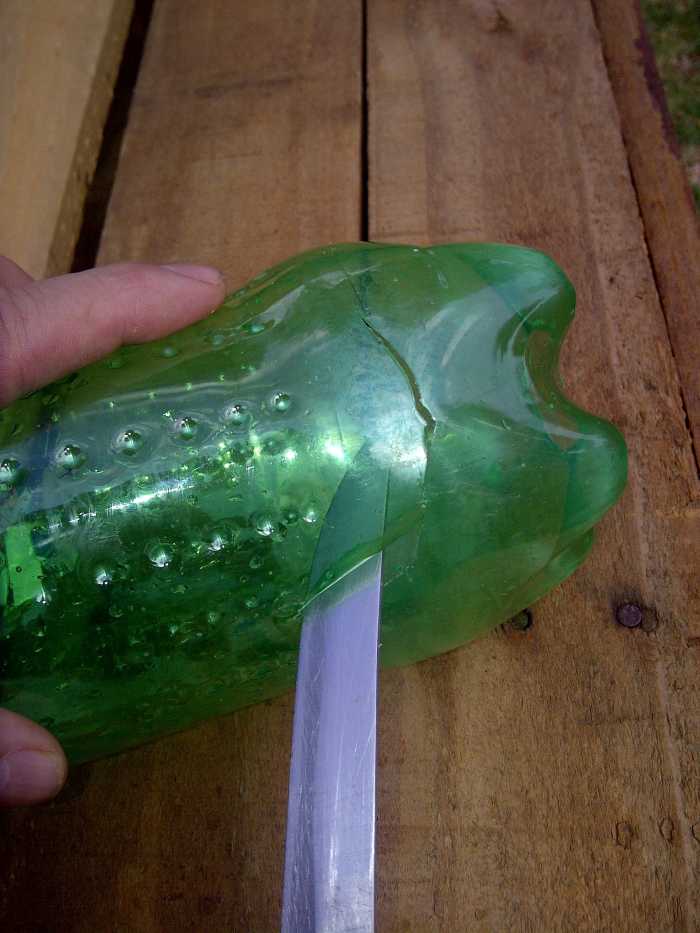
Cutting the hole at the bottom of the bottle, not to large.
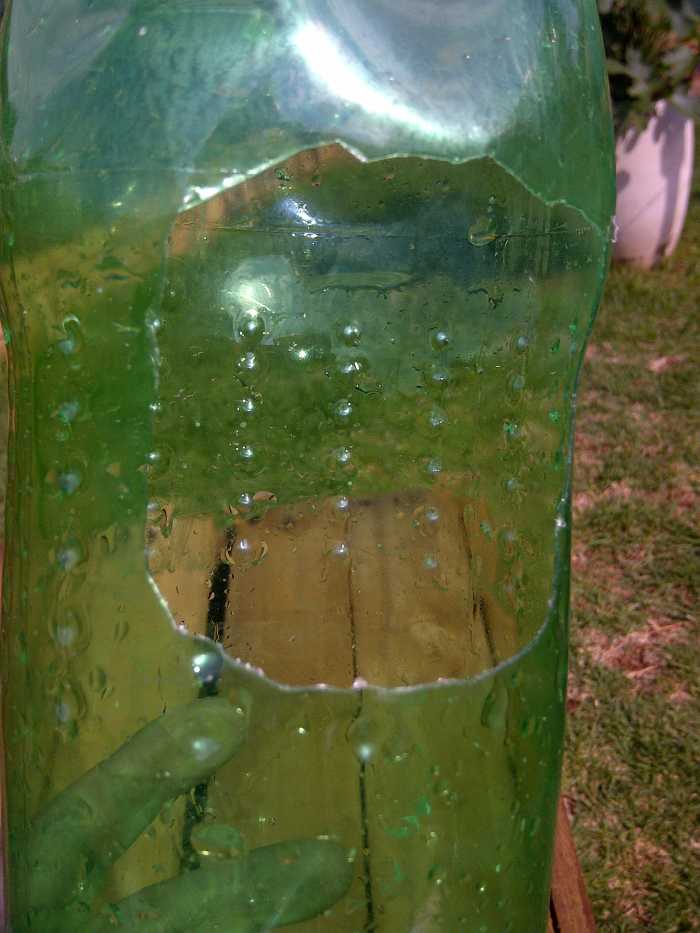
The bottle after it is cut to size.
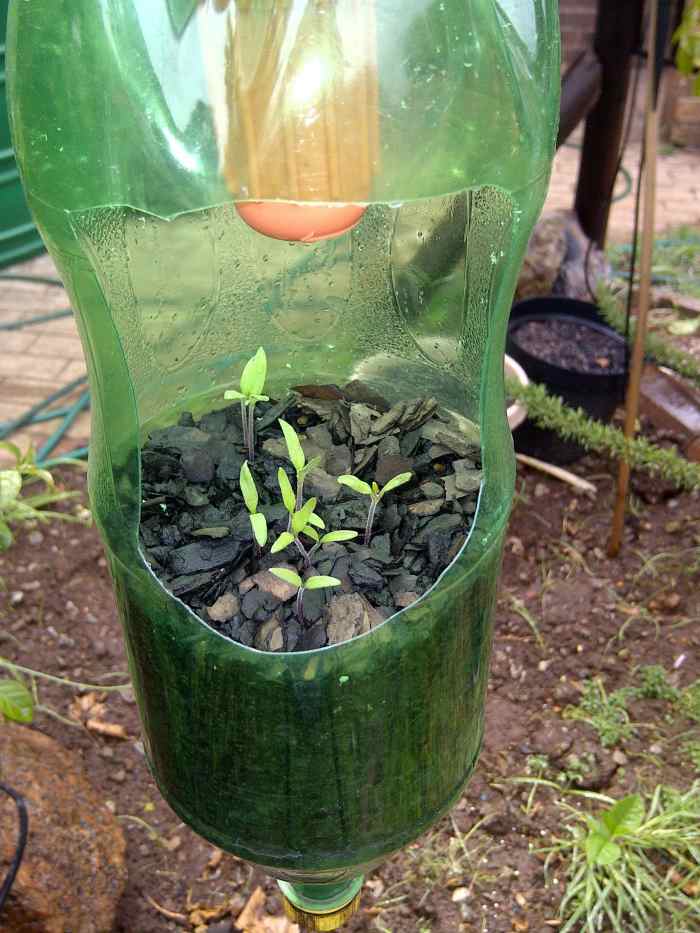
Step 2: Cut Holes for Plants
I cut a hole into the side of each bottle where the plant will grow out (see the photos above) and also to screw the cap on. This has other advantages as well. The bottle is now also a small greenhouse, and your plant can grow out of the bottle. Fewer pests will affect your plants, like cutting-worms and other insects.
It is best to first hang up the "bottle garden" before filling the bottles with potting soil, but before you do, if you have some small gravel, put that in first so that the neck of the bottle is filled with a draining medium. This will help for better drainage.
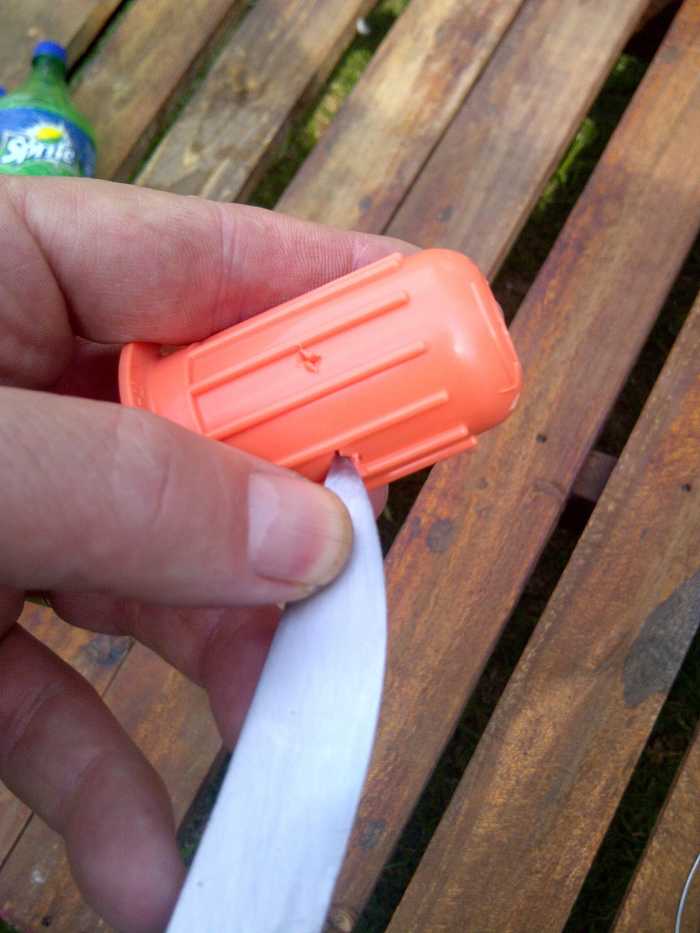
The printing cartridge cap.
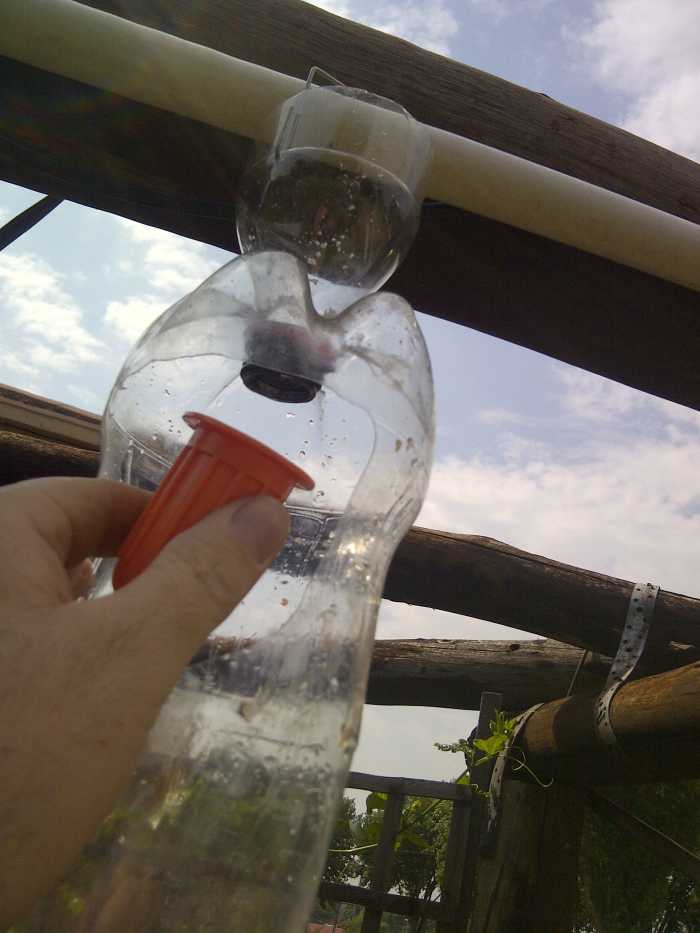
Step 3: Create Drainage Holes
The printer caps are a perfect fit,, but you can also use the bottle cap if you don't have printer caps. You only have to make holes in it so that the water can run out freely. In the beginning I drilled small holes all around them but then the water runs out too quickly.
Prick a few holes in the bottom and sides of the bottle cap with a sharp knife. It will ensure that the water has the correct flow. So basically, if you do not have one thing, you can use the other as a replacement.
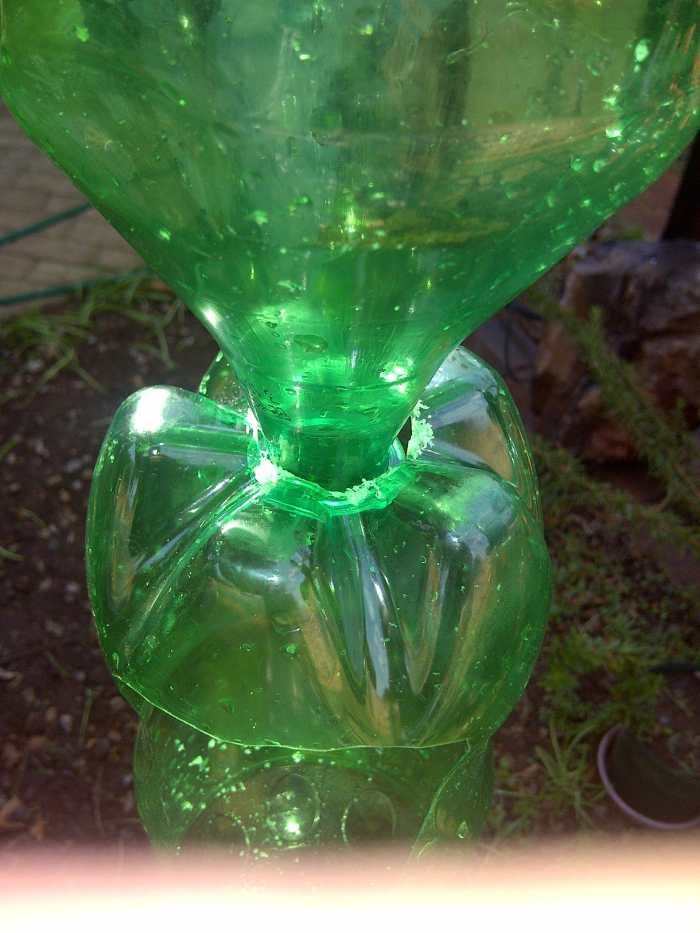
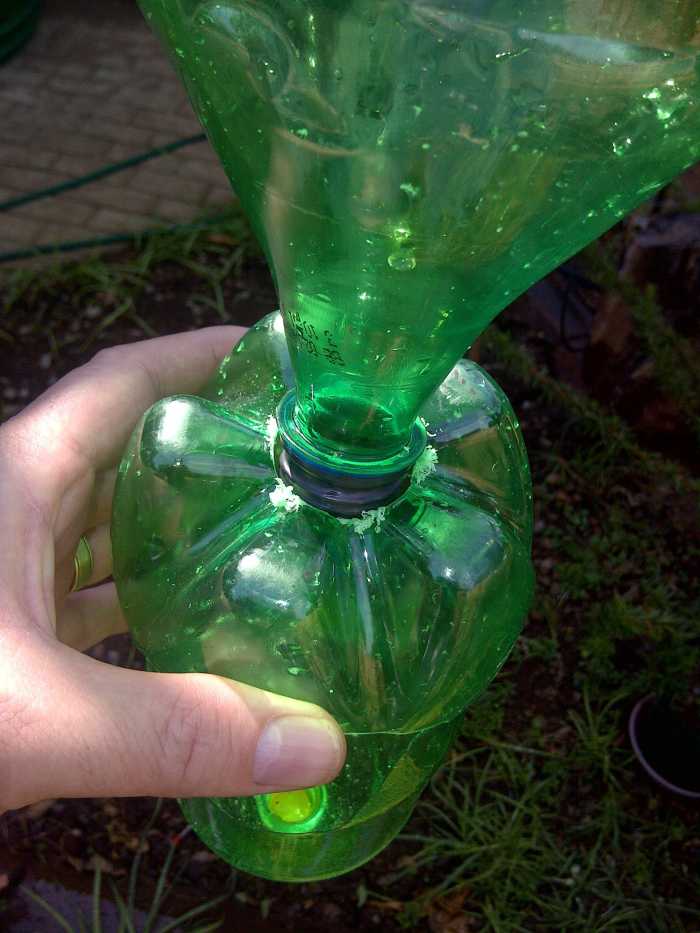
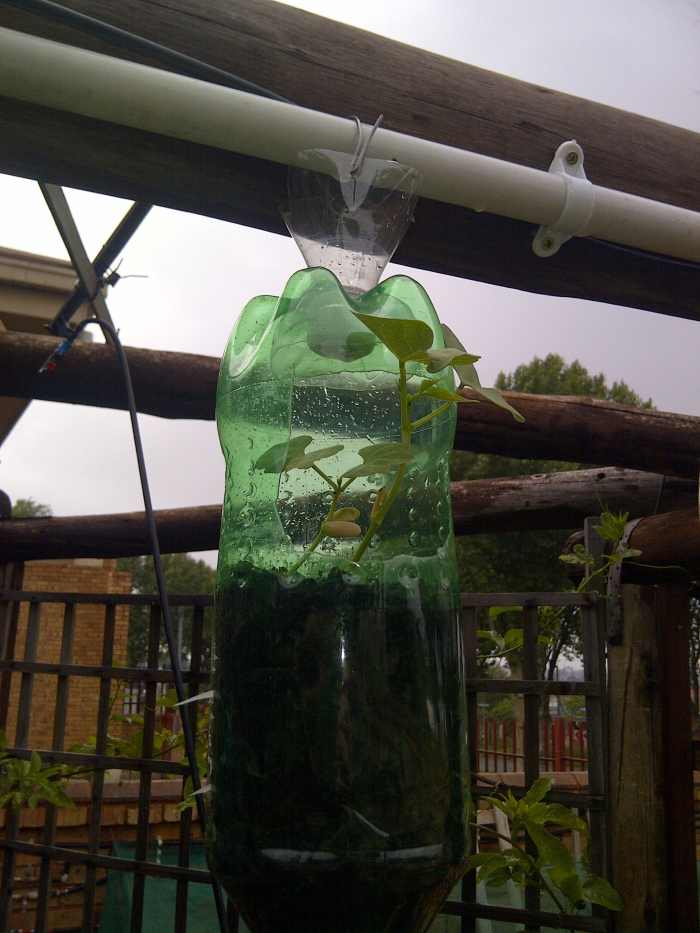
The inserted bottles without a cap
Apply isolation tape to the top of the bottle
Read More From Dengarden
Insert top bottle into the bottle below
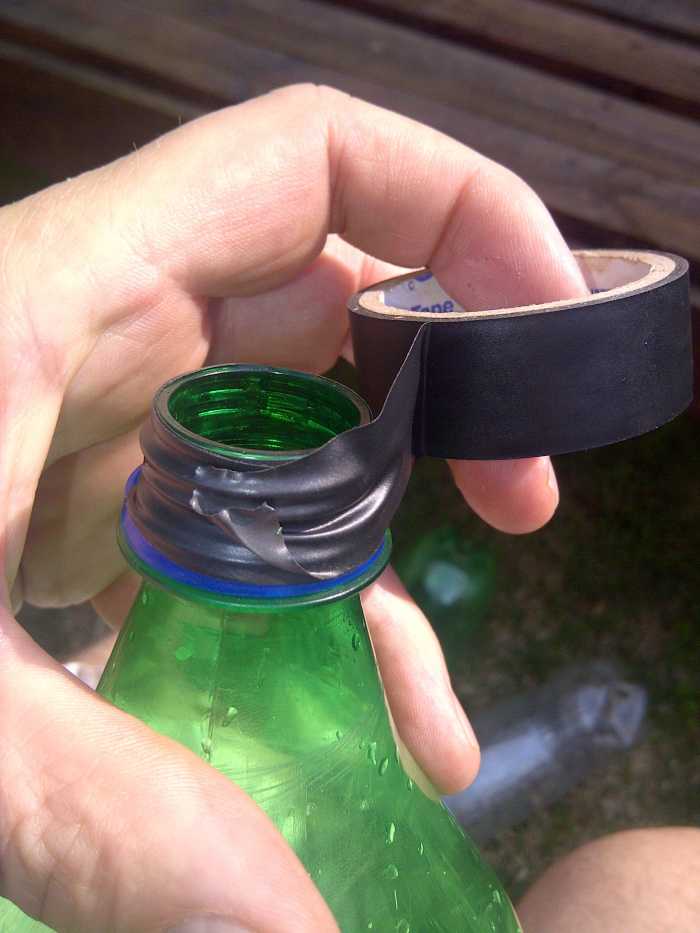
Step 4: Screw Bottles Together
Now the next challenge was to arrange the bottles one above the other or to screw them together. The cap was too small so I needed something that I could attach between the cap and the neck of the bottle to secure it. I remembered that I had a few printer cartridge caps and went to get one.
After some trial and error, I got out the insulation tape, and give it a few turns around the bottleneck and screwed on the cap, otherwise the printer cartridge cap is too loose. It was a perfect fit and could hold the weight of the soil-filled bottles.
After some time the weight of the bottles and the wind motion made the bottles tear loose. I then took the bottles and inserted the one bottle inside the hole of the previous bottle and then replaced the cap, finding that this technique was perfect, even though the bottles have a tendency to swing.
Horizontal holes drilled through the bottle
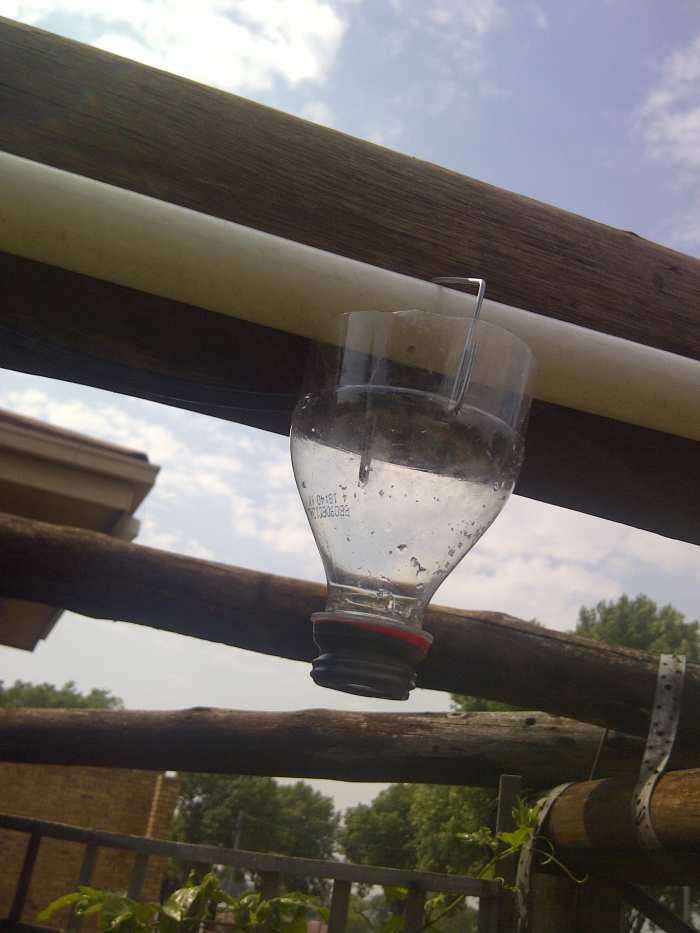
Step 5: Hang Your Garden
When you hang your "bottle garden," remember that five 2-liter bottles are very heavy and will bend the water pipe. To avoid this problem, install an iron rod above so that it will support the weight. Fasten the water pipe to the iron rod with wire to strengthen it. Make sure that the water flows evenly from bottle to bottle simultaneously.
Secure your PVC pipe to a horizontal pole where your bottles are going to hang from:
- I drilled a horizontal hole on either side of the top row of 2L bottles.
- In these holes, I placed the PVC pipe and drilled some small holes to carry water through my hanging garden.
- I also discovered that five is the maximum number of bottles that can be hung before the edges start to tear.
- I later changed the design because the bottles kept on tearing. We will discuss this next.
Remember to drill small holes in the pipe where the water could drip into the hanging bottle garden. Holes must be evenly spaced to fit above the hanging bottles. Secure a water source to your PVC pipe, not too strong a flow.
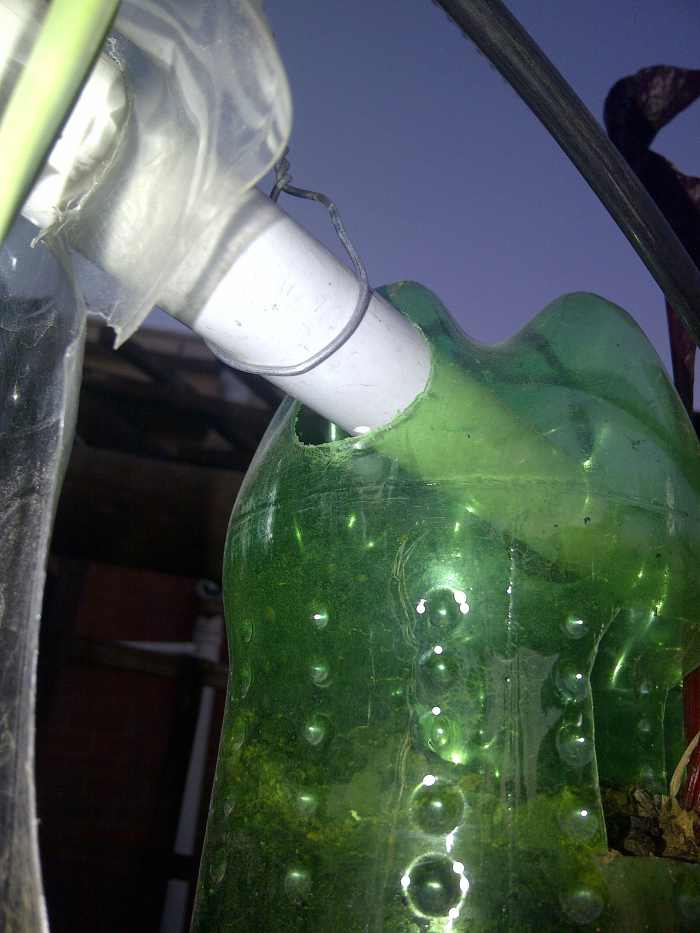
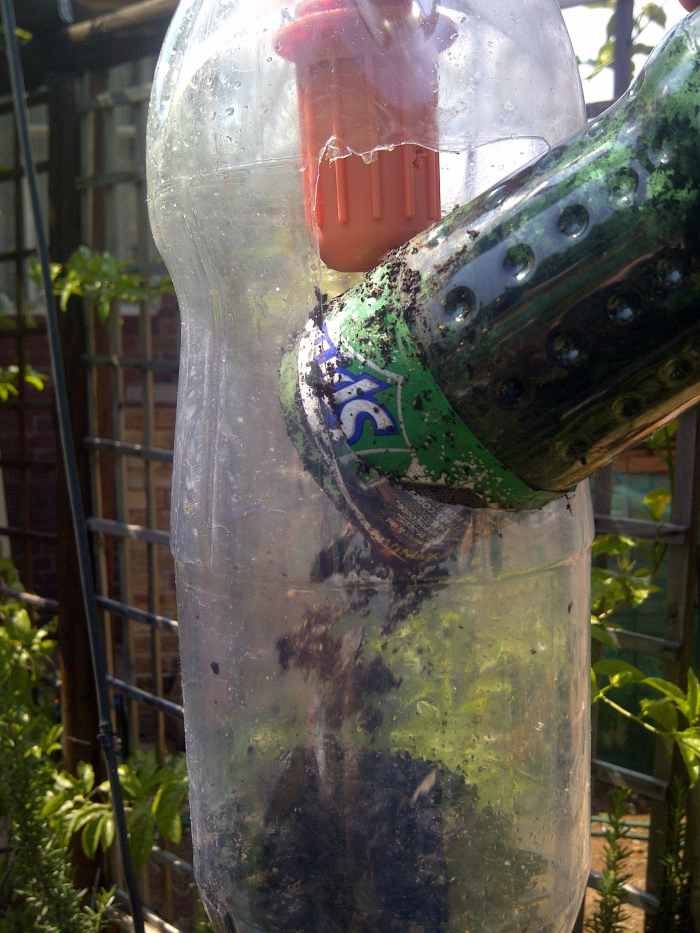
Alternate Way of Hanging the Bottles
I found that if you drill a horizontal hole through the bottles, it will eventually tear the bottle. I then thought of a new way by cutting a 500ml bottle and securing it with some wire onto the watering pipe. This worked better, and I had no more tearing bottles. See the step-by-step photos below to learn how to do it.
Photo Tutorial: Alternate Hanging Method
Use some wire to fasten the bottle to the water pipe.
Hanging the 1/2 lt bottle onto a water pipe with a small hole drill in it.
After hanging your first bottle place the cap on.
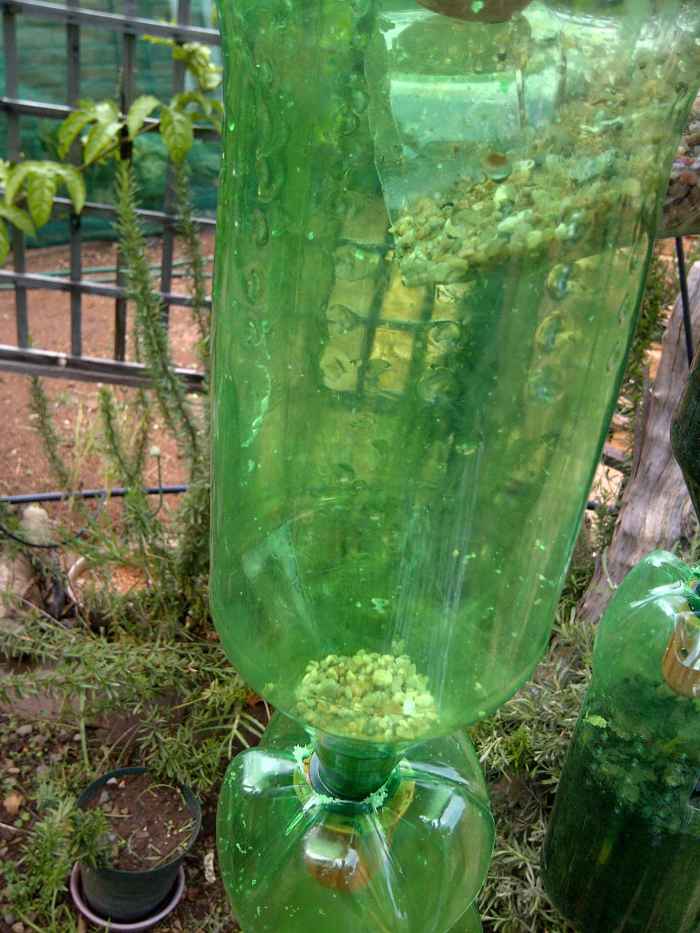
Step 6: Fill Bottles With Soil and Gravel
- Now fill the bottles with a little gravel for drainage.
- Now fill the bottles with soil.
I like to use potting soil because it attracts less pests and has less weeds.
Using a 500 ml cut bottle, I carefully filled all my bottles with potting soil.
Photo Tutorial: Filling the Bottles

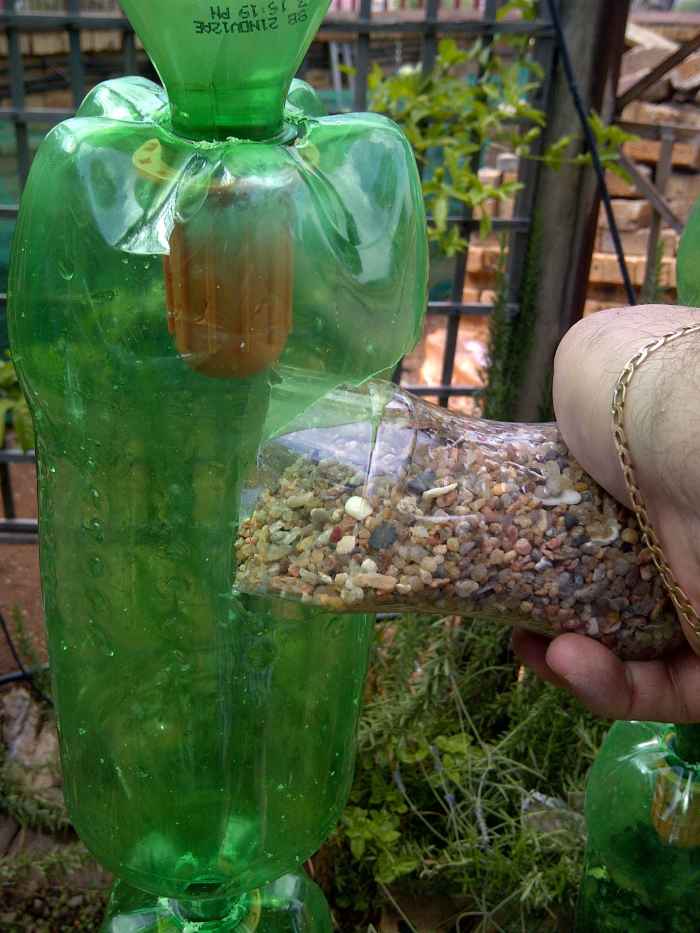
Putting some gravel into the bottle, only the neck will do.
Gravel in the bottom of the bottle
Bottles are now ready for filling with potting soil.
Filling up the bottle with potting soil.
Step 7: Plant Your Hanging Garden
The next step was deciding what I could plant in my hanging garden. I started by planting some herbs from the garden like lavender, spearmint, lemon thyme, thyme, strawberries and chives. I also sowed some rosemary seed and later beans and cherry tomatoes.
The beans and tomatoes are my new experiments which I plant in the top bottles so that I could guide the plants over the brace, giving more weight support to these plants, also allowing them to run. I will report later with the results.
If there are any suggestions or comments, feel free to share as it could be most helpful.
Photo Tutorial: Planting
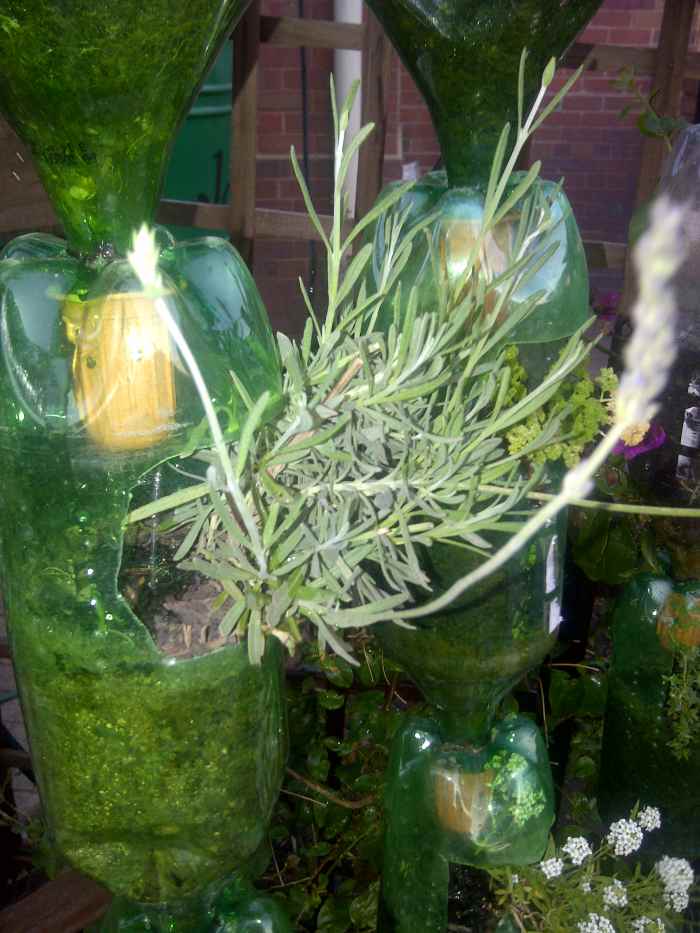
Lavender and parsley
Beans
Tomatoes
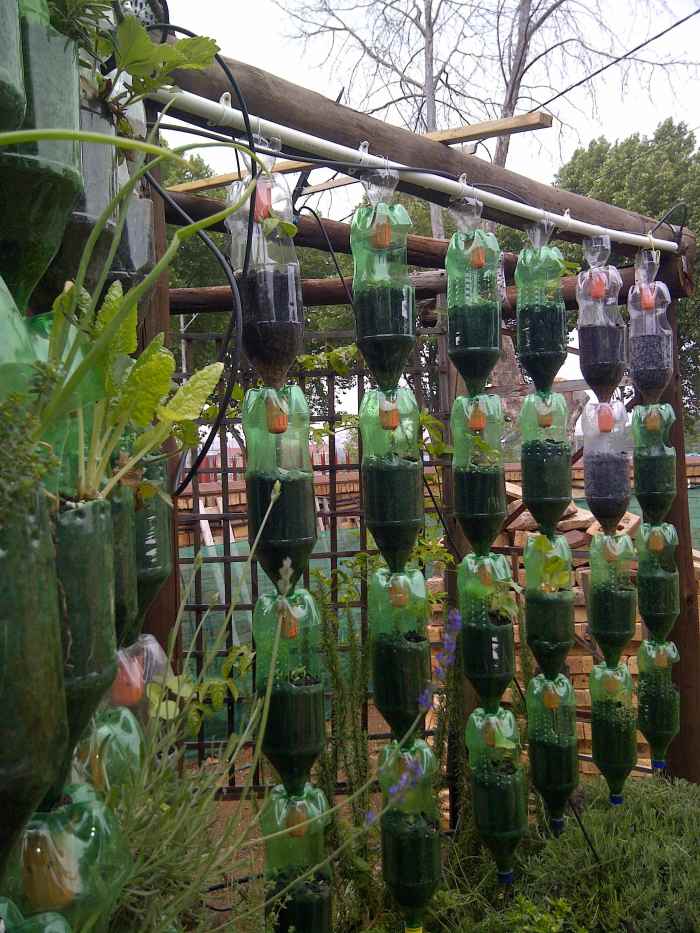
Here is my hanging garden on the left after one year, and most herbs are flourishing, and the bottles on the right is planted with beans and tomatoes. As we can see on the photo, the beans have just germinated and are growing well.
This content is accurate and true to the best of the author's knowledge and is not meant to substitute for formal and individualized advice from a qualified professional.
© 2012 Louis Fourie
Augustus on January 22, 2018:
Its quiet fascinating and highly impressed with the whole project. Where I live plastic bottles and bags are floating everywhere. Its an eye opener for this exposure and I think this kind of project will work for me and my household.
How do I deal with insects that will pose any danger to my crops.
Louis Fourie (author) from Johannesburg, South Africa on May 30, 2017:
Now is the time to prepare or build your Haning garden for Spring. That way you will be ready to plant in time.
Louis Fourie (author) from Johannesburg, South Africa on October 29, 2013:
Lexis Seah, we'll rain does not bother the hanging garden mush, you must make sure that the soil is always moist.
Tomatoes and parsley is good growers, that I have planted. Herbs seems to grow better in the garden if not in full sun.
Experiment with plants like, things that is not to large and plants you are going to eat. Strawberries , spinach and tomatoes. Hope it helped?
Lexis Seah on October 24, 2013:
Hi Louis, I notice 1 of your article regarding "Recycling plastic bottles", it is amazing you had built your own bottles garden, i would like to do the same to the orphanage house in my country.
Just need some advise from you, I lived in Malaysia, which is summer and rainy all the times. What types of plant is suitable to plant in the bottles at this weather? Besides, how do you manage them after these plants grew up? Move them back ground?
Sorry to ask so many questions in 1 time.
CraftytotheCore on July 29, 2013:
This is amazing! Great work! Voted up! I love the presentation of this. This would be awesome for a classroom. I bet teachers would love this idea.
Louis Fourie (author) from Johannesburg, South Africa on July 25, 2013:
Yes it is fun and everyone can make a hanging garden.
Louis Fourie (author) from Johannesburg, South Africa on July 25, 2013:
Yes it is fun and everyone can make a hanging garden.
Hear Me from Somewhere in Florida on June 04, 2013:
That looks really fun and awesome! I need to give this a try!
Louis Fourie (author) from Johannesburg, South Africa on May 30, 2013:
Thanks taliesin 13 it also work, but in the summer the sun is to warm, so had to put a net over. Going to build me a new hanging garden but with larger bottles.
Tarran J from Australia on May 30, 2013:
Very good idea. Love it
Deya Writes on January 24, 2013:
This is so cool! :)
rOBERT hEWETT SR. from Louisville, Kentucky on January 02, 2013:
Very creative, interesting and simple enough for the average person to do. Thanks for these great ideas. You have a natural talent for writing How To Do articles, books, etc.
Eiddwen from Wales on October 23, 2012:
Wow amazing and I have to save this gem ,have awonderful day .
Eddy.
Eunice Elizabeth from Vancouver, BC on October 21, 2012:
Well.....aren't you creative !!! Well detailed with lots of awesome photo's and how too's !! Great Hub
voted awesome, interesting & voted up
Where Were The Hanging Gardens Of Babylon
Source: https://dengarden.com/gardening/Recycling-plastic-bottles
Posted by: hatchsubte1954.blogspot.com
0 Response to "Where Were The Hanging Gardens Of Babylon"
Post a Comment